This is a good starter video that I watched when I was first trying out glitch effect in Adobe Photoshop, I don’t use all of them and I don’t exclusively just use these tricks but none the less it’s a good place to start when learning how to mess with layer effects and create that glitch effect you are really looking for.
What I like to do the most (as in more then anything else) is layer styling and blending options. I think that without even doing much to an image you can really get some solid effects going by slapping two images on their own layer and applying a layer style to it and then a blending option such as taking all the green out of an image. The RGB settings inside the blending options are a powerful tool and can be used to make some real interesting images. After you have a layer with one or more of the RGB settings separated from it you can move the image on the layer or shrink and expand it some so its at a slightly different position making an almost color shift like effect on the work area. Combine that with another layer that has the layer style of “screen” or “overlay” and you can make a really nice effect
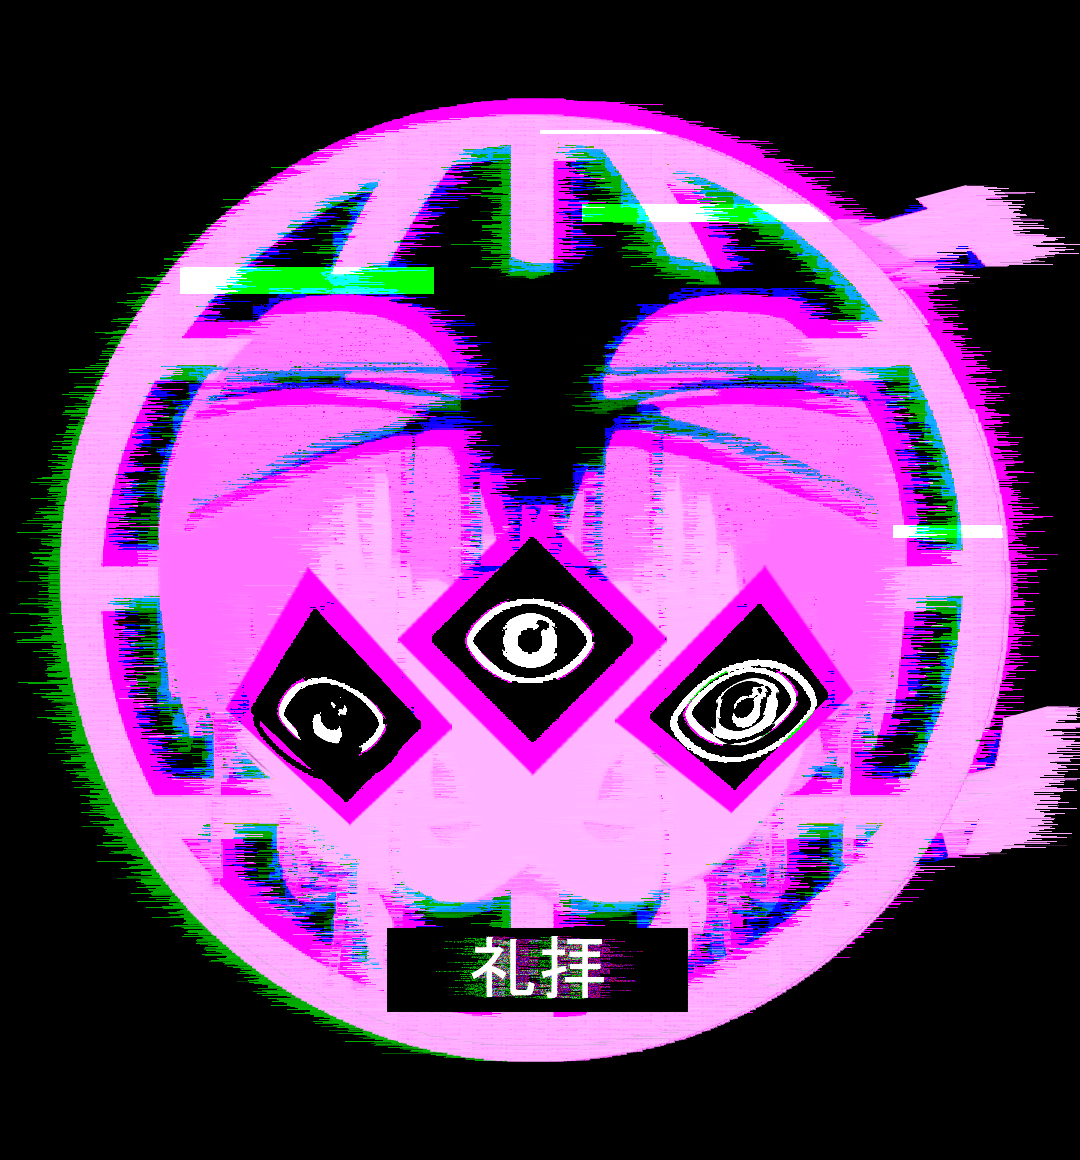
Photoshop has a large catalog of effects that can be used, each effect can be interesting and unique even without knowledge on how to use them however if you do know what you are doing with them they can make an image even better. For instance take one of those layers that has one of the RGB values separated from it, if you apply the wind effect to a layer that say has “G” or “Green” separated from it will make a distortion effect where the image appears to be blasted on a color spectrum. The image below shows examples of the methods used here.
Sometimes you might want image to have a more intense look to it, one of the ways I do this is by replicating the layer with the image a few times and applying something like “hard light” style to some of them and maybe “overlay” and then separating an RGB value from one.

Some of the final things you can do to an image are probably some of the simplest things like cutting pieces of an image like a puzzle and moving them slightly here and there to give it a more corrupted look. Maybe adding text in a text bar on top of an image if it has a face inside it. Something I like to do is adding a scan like effect and a noise effect, noise is extremely easy to add to an image since it’s an effect but scanlines might be a bit more tricky you can create and define your own scanline pattern or you can find one within the effect catalog if your willing to search for it some, once you have a scanline layer all you really need to do is set it to “overlay” or “screen” same with the noise layer.